Acoustic panels are a great way to improve the sound quality in your space. They can enhance high-end speaker systems and reduce echo and volume issues in public areas. However, installing panels on the ceiling can be challenging. Here’s how to Install Acoustic Panels on the Ceiling:
- Plan your panel placement relative to your ceiling joists. This will ensure that the panels are properly aligned and secure.
- Install eyelets in your panels and joists. This will allow you to use zip-ties to secure the panels in place.
- Use zip-ties to install the panels. Zip-ties may seem unusual, but they are an effective way to secure the panels and improve the performance of your system.
It’s essential to note that installing acoustic panels on the ceiling can improve the sound quality of your space. By following these instructions, you can make the process less intimidating and more successful.
Table of Contents
Pros of Installing Acoustic Panels on the Ceiling
Acoustic panels are a versatile tool for managing sound in any space. They can enhance the quality of a sound system, reduce noise in busy environments, and improve the fidelity of recordings. While wall-mounted panels are the most common, placing them on the ceiling can also be very effective.
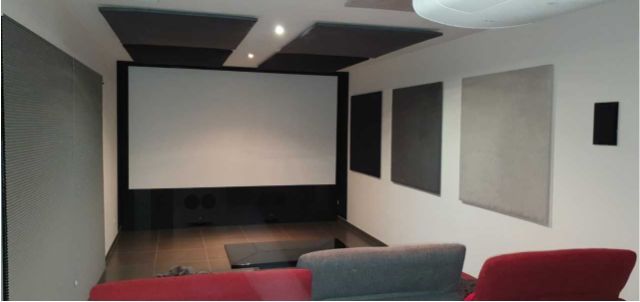
Ceilings are one of the biggest sound reflectors in space, and sounds will bounce off them just like walls. However, a high ceilinged space may absorb some sound naturally, but the louder and stronger the sound waves, the less effect a high ceiling will have. By placing acoustic panels on the ceiling, you can create an even more aggressive sound management environment. This can be particularly useful for expensive home theater systems, or for reducing noise in crowded spaces.
When outfitting a recording studio, it is important to consider the use of foam vs panels and placement guides. In many cases, foam panels are easier to install, and can be used for 100% coverage if desired.
It is recommended to consider your space and how many panels you need by using our guide on how many panels you need, and when to use acoustic panels, to get a better understanding of whether this solution is right for you.
Installing acoustic panels on the ceiling is an effective way to improve sound quality and control noise in any space. They are versatile tools that can be used in a variety of settings and can be especially useful for expensive home theater systems, recording studios, and crowded spaces.
Install Acoustic Panels on the Ceiling – Step-By-Step Guide
If you’re ready to install acoustic panels on your ceiling, here’s a suggested plan of action:
Plan The Panel Placement Relative To Your Ceiling Joists
When attaching acoustic panels to your ceiling, it’s important to consider the materials and size of the panels you will be using. If you have purchased pre-made panels like the ATS Acoustic Panels (On Amazon), make sure the border is thick enough to accept screws. If the border is metal, you’ll need to come up with a different strategy for attaching the panels. If you’re building your own panels, you have the flexibility to plan how you will attach them.
When using wood construction materials like 2-by-4s, make sure there is at least an inch of width to work with so that you can screw into them. Determine the dimensions of your panels(Our Guide) and plan where on your ceiling you’d like to place them. Use painter’s tape to mark off the borders of your panels and use a stud finder to determine the configuration of the joists in your ceiling. By marking the joists with painter’s tape, you’ll be able to see if any of your panels need to be shifted to align with the joists.
It’s crucial to take the time to plan and prepare before attaching the panels to the ceiling. By following these instructions, you’ll be able to ensure that your acoustic panels are properly attached and will provide the sound management you desire.
Install Eyelets In The Panels And Joists
Once you have the placement of your acoustic panels figured out relative to your joists, the next step is to install fasteners that will allow you to attach them properly. Using eyelets like the AxeSickle 2 Inch Metal Eye Hooks (On Amazon) is a good option as they will allow you to install an air gap between the panels and the ceiling, which will improve their performance.
Using the painter’s tape from step one, double-check the placement of the panels to ensure that they will be supported evenly by the joists. Then, install eyelets in the ceiling that match up with where the acoustic panel will go.
Make sure to use at least four eyelets and that at least two of them are in the joist, so the panel is secure. Also, space them evenly so that the panel doesn’t hang at an angle.
Next, you’ll need to install eyelets on the acoustic panels themselves. You may need a second pair of hands to help at this point. Hold the panel up to the eyelets you’ve installed on the ceiling and mark the matching spots on the acoustic panel’s frame. Then install eyelets in those spots on the panel frame.
If your measurements are precise, you don’t need to hold the panel up to the ceiling to match the eyelet positions. However, this method is recommended as it serves as a cheap insurance.
Use Zip-Ties to Install the Panels
The final step is to hang the panels on the ceiling. If you’ve followed the previous steps, this should be straightforward, although you’ll likely want a second person to help.
Using zip ties like the HS Premium 12 Inch Heavy Duty Zip Ties (On Amazon), bring the panel in line with its positioning on the ceiling and then connect the zip tie through the matching eyelets.
Don’t tighten the zip ties all the way at first, simply thread them through so that you can get the panel secured to the ceiling. Then, step back and check the placement. If the panel looks askew, determine which set of eyelets needs to be shortened, and tighten up that zip tie. You can use a level to double-check things.
The advantage of this method is that it allows an air gap between your ceiling and the panel, which actually increases its effectiveness. The aim is to achieve a final gap width of about two inches, which should be no problem with the eyelets and zip ties.
By following these steps, you should be able to successfully install acoustic panels on your ceiling and improve the sound quality in your space.
To Sum Up

As you can see, installing acoustic panels on a ceiling can be a daunting task. It’s natural to feel stressed about making holes in the ceiling. But, with proper planning and taking the time to mark your joists and methodically place everything, the job can be completed with ease. It is important to take your time and not rush through the process, by following the steps and guidelines, you can ensure the success of the installation.