Running cables to your surround speakers can be a hassle, especially if you have to crawl through the attic. Not everyone wants to go through that hassle, and certainly not me! Wireless speakers are becoming more popular in audio and video setups, but they can be expensive. How to make normal speakers wireless?
But don’t worry! You can easily convert your current surround sound speakers to wireless speakers using a wireless speaker kit. These kits work by sending audio signals through RF (radio-frequency). Keep in mind, you may need to connect a separate amplifier to the speakers as most kits do not provide power.
Setting up a wireless speaker kit is easy. We’ll go over the process, so you’ll know exactly what to do. Most of these kits are simple to configure, so you don’t have to worry. With these wireless kits, you can enjoy your audio and video setups without having to deal with the hassle of running cables.
How Does a Wireless Speaker Kit Make Regular Speakers Wireless?
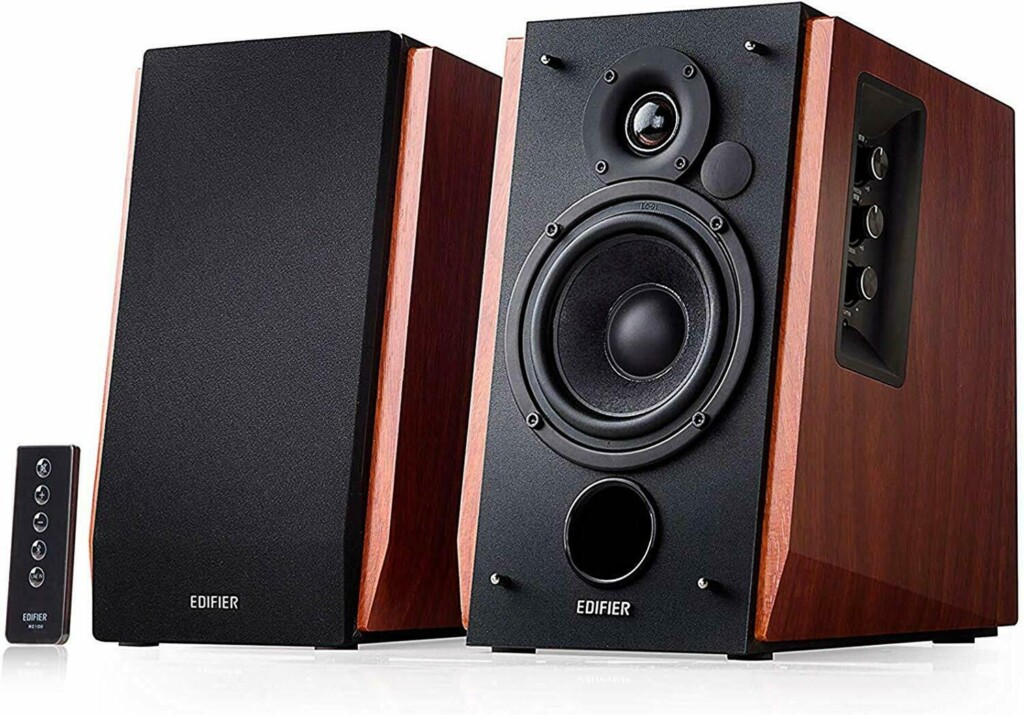
Wireless speaker kits are a great way to make your regular speakers wireless. They work by sending audio signals through RF (radio-frequency) and providing a high-quality signal to your surround speakers.
Each kit contains both a transmitting and receiving unit. The transmitting unit accepts inputs and transmits them to the receiving unit, which processes the signal and sends it to the connected outputs.
Keep in mind that you may need to add a separate amplifier to power the speakers because power doesn’t travel wirelessly and most wireless speaker kits don’t have a built-in amplifier. Many rear speakers are passive and don’t supply their own power. If the receiving unit has a built-in amplifier, it will provide a small amount of power, but it’s best to use a separate amplifier for reliability.
Also, note that RF is the same signal used by WiFi and many kits operate around 2.4GHz. So, be mindful of the location of your router or WiFi access point, as they can potentially cause interference.
What are the Steps for Configuring a Wireless Speaker Kit?
The setup of your wireless speaker kit can be complicated, depending on your speaker setup and the kit you choose. I will do my best to provide general information and guide you through the setup process for most scenarios. Typically, you will only need one kit for your rear speakers and/or subwoofer.
Setting up the front channel speakers is usually straightforward as the receiver is usually located close to the speakers. However, the rear speakers and subwoofer are often located far from the receiver or amplifier.
Whether you run a cable or use a wireless kit depends on the location of the rear speakers and subwoofer. If running speaker wires is tedious because of the room layout, the wireless transmitting and receiving unit can make your life much easier. If you have any questions, please leave a comment, and I will be happy to answer them!
1. Choose a Wireless Speaker Kit
When choosing a wireless speaker kit, there are two main types to consider:
- Kits without a built-in amplifier: These kits only send an audio signal and require an additional amplifier to power the speakers.
- Kits with a built-in amplifier: These kits come with an amplifier built into the receiving unit.
It is recommended to choose a kit without a built-in amplifier, as the power output from the wireless receiving unit is typically low and might not be enough for your speakers.
When selecting a kit, consider the inputs available on the transmitting unit and the outputs available on your A/V receiver. If your receiver has pre-outs (RCA outputs for different speaker channels before power is applied), you can connect the RCAs from the receiver to the transmitting unit.
If your receiver does not have pre-outs, make sure the transmitting unit accepts regular speaker wire as an input or use a line-level adapter (on Amazon) to convert speaker leads to RCAs. Some kits include inputs and outputs for a subwoofer, which makes connecting the subwoofer simple, as many subwoofers come with a built-in amplifier. I will provide further details on how to connect everything in a later section.
Wireless Speaker Kits with No Built-in Amplifier
If you’re in the market for a wireless speaker kit without a built-in amplifier, here are a few options to consider. Just keep in mind that the prices of these kits are subject to change.
First, there’s the Moretop Wireless Video & Audio Transmitter and Receiver. This kit is actually an audio/video wireless kit, but you don’t have to use the video features. It has received the best reviews out of all the wireless kits I found.
Another option is the BIC America wireless speaker kit, which uses RCA inputs and outputs. With a range of 60ft-80ft, it’s on the higher end of non-amplified wireless kits.
Lastly, the Dynasty ProAudio WSA-5TR (on Amazon) is similar to the BIC America kit and is also highly reviewed. It’s very easy to use and offers a great audio transmission experience.
It’s important to note that these kits do not provide power for the speakers, only the audio signal. To power your speakers, I suggest using a mini amplifier (on Amazon).
Wireless Speaker Kit with a Built-in Amplifier
If you’re looking for a wireless speaker kit with a built-in amplifier, the Amphony Model 1800 (on Amazon) is the best option available. With its high-quality audio transmission and impressive 80-watt amplifiers, this kit is sure to exceed your expectations. It uses a single transmitter to send audio signals to two separate receivers, each with its own built-in amplifier. With a range of up to 300ft, the Amphony Model 1800 is a top choice for those in need of a built-in amplifier.
Another option is the OSD WRSK-250 Subwoofer and Speaker Kit (on Amazon), which also comes with a built-in amplifier on the receiving end. However, this kit only provides 25 watts of power per channel, which may not be enough for your system. The good news is that it has line-out RCAs for the speakers and the subwoofer, so you could use a separate amplifier if needed.
Please note that kits with built-in amplifiers are less common than regular non-powered kits, so they may cost more. Before making a purchase, consider if it’s worth the higher cost to get a kit with a built-in amplifier.
2. Connect the Transmitter
With your wireless speaker kit selected, it’s time to get your regular speakers to work wirelessly. Here’s what you need to do:
- Connect the transmitter to the receiver or amplifier. The transmitter sends audio signals wirelessly using RF. Depending on your kit, there may be different options for inputting the audio signal, including speaker wire, RCA, and/or Aux 3.5mm.
- For speaker wire inputs, connect normal speaker wire from the two speaker outputs on the receiver to the inputs on the transmitter.
- If you have RCA inputs, connect RCA cables from the pre-outs on the receiver to the RCA inputs on the transmitter.
- If your transmitter only has a 3.5mm input, you’ll need an RCA to 3.5mm adapter to connect the receiver to the transmitter.
- Finally, plug the AC power adapter into the transmitter and a power outlet.
3. Connect the Receiver.
Connecting a wireless receiver to speakers to make them work wirelessly depends on the setup of the wireless speaker kit and speakers. Here are a few common scenarios:
- Using a Separate Amplifier: Most commonly, you need to connect RCAs from the receiving unit to the amplifier, then connect speaker wire from the amplifier to the speakers. The receiving unit sends the signal to the amplifier, which then applies power to the signal and sends it to the speakers. Ensure that you plug the AC adapter into a power outlet and connect the other end to the receiver.
- Using a Receiving Unit with a Built-in Amplifier: If the receiving unit has a built-in amplifier, making the connections is simple. Connect speaker wire from the receiving unit to the speakers and plug in the power for the receiver. However, the power provided by the receiving unit is likely low, so the connected speakers might not output a lot of sound.
- The Speakers Have an Internal Amplifier (Active Speakers): With active speakers, simply connect RCAs from the receiving unit to the speaker. The speakers have their own power source and internal amplifier, so they only need an audio source to output sound. Remember to connect the power adapter for the receiving unit.
4. Test the System!
Congratulations! You have successfully transformed your regular speakers into wireless speakers. By following these steps, you have added a new level of convenience and flexibility to your audio setup. Now, you can enjoy high-quality sound from anywhere in the room without having to deal with the hassle of running cords and cables.
Remember to regularly check the connections and adjust the levels as needed to ensure optimal performance. Also, be mindful of the range limitations of your wireless speaker kit and keep the transmitter and receiver within the specified range.
Enjoy your new wireless speaker setup and happy listening!
Final Words
Making regular speakers wireless is a simple task with the right equipment and setup knowledge. This article aimed to provide enough information for you to understand the process.
If you don’t want to go through the setup process, you can buy a wireless speaker system. Keep in mind that high-quality natively wireless speakers can be expensive.
If you’re on a budget, you can find a decent set of wireless speakers for a cheap price. However, these speakers may not have much power behind them. The more expensive sets are usually more efficient in sound production.
In my opinion, setting up a wireless speaker kit is not complicated. If you already have speakers and a lower budget, give it a try. You may be surprised by how well it works!
If you encounter any issues with your speakers, check out the 9 basic troubleshooting steps in this article for fixing home theater speaker issues.
Read Also: Troubleshooting a Soundbar: Easy Fixes for Soundbar Problems


