

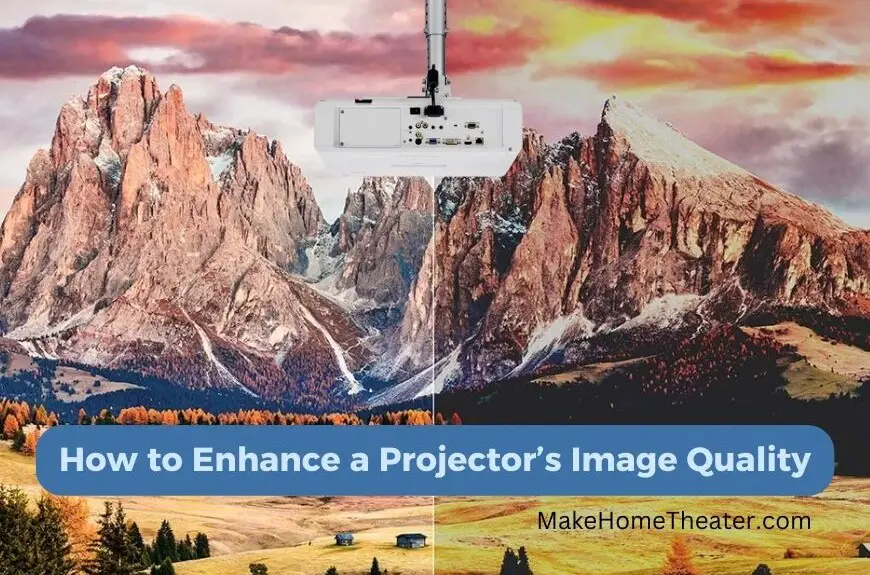
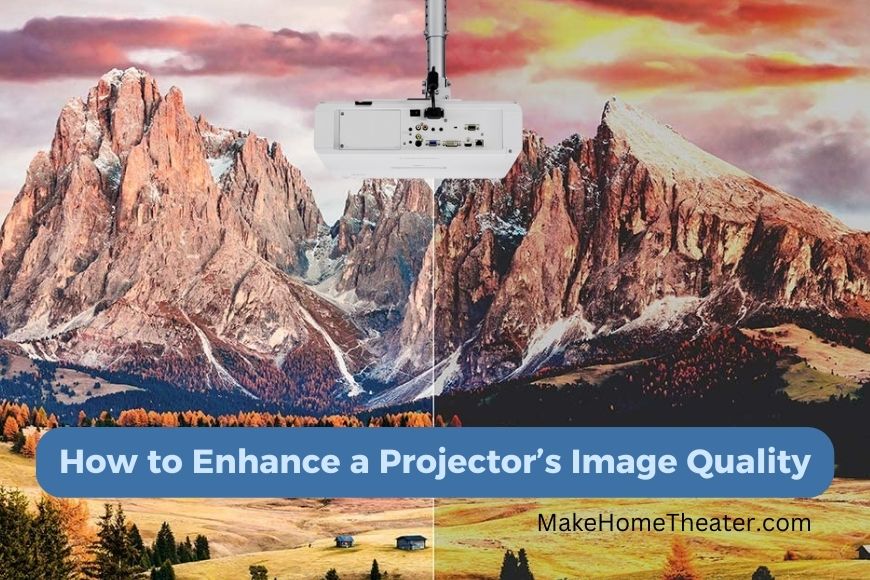
Setting up a projector for the first time can be a challenge. There are so many variables to consider, such as the projector’s positioning, screen size, and room lighting. But don’t worry, it’s easier than it seems. By making small, methodical changes, you’ll be able to enhance a projector’s image quality in no time.
The first step is to adjust the projector’s focus. Make sure the image is crisp and clear. Then, check the lens for any dust or condensation that may affect the image quality.
Next, think about the positioning of the projector. Is it too close or too far from the screen? Consider moving it to the perfect spot for your setup. Then, adjust the keystone correction to straighten out any distorted images.
Finally, play around with the sharpness and resolution settings. These settings can help you fine-tune your projector’s image to your liking.
Don’t be intimidated if some of these terms are unfamiliar. This article will provide more details on what they mean and how to adjust them. Just take it one step at a time, and soon you’ll have a perfect image on your screen.
Table of Contents
Adjust the Projector’s Focus

What is Projector’s Focus?
Focus is the first aspect to consider when adjusting your projector’s image quality. If the image appears blurry or fuzzy, the focus adjustment ring around the lens can be used to enhance the picture.
By twisting the focus ring, you change the distance between components within the lens, which either narrows or expands the image. Usually, the image appears blurry due to small mismatches between the in-focus image and the screen.
When you place your hand in front of the projector, it projects a small image, but most people prefer to project a 100-inch diagonal image on the screen. As you move away from the projector, the image gets larger.
To understand focus better, try moving the screen to different distances from the projector. You’ll notice that there’s always a distance where the image appears clear. This is because the projector’s light beam has expanded enough to create a clear image.
How To Adjust Projector Focus
Unfortunately, we can’t simply move the screen to find the optimal distance for the projector. Instead, we use the focus ring to make the setup process easier.
First, determine where you want the screen to be and then place the projector far enough back to meet the requirements of its throw ratio. When you turn on the projector, use the focus ring to move the slice of the light beam with the clear image to the screen.
The goal of the focus ring is to position that slice of the light beam on the screen. If you haven’t installed the projector yet, we have an article on throw ratio and calculations you can use to get it right.
Check the Lens for Dust or Condensation

If your image is blurry or fuzzy, it may not be the entire image, but just a part of it. In this case, the issue could be with the lens of the projector. The lens is where the light comes from, so if there are fingerprints or dust on it, it will interfere with the light beam and cause distortion.
The most common cause of this issue is fingerprints that collect dust on the lens. However, if the projector has been sitting for a while, dust may have accumulated on the lens over time. In rare cases, if the projector has been disassembled, dust could be inside the lens causing the problem.
Condensation
close or too far from the screen. This can result in a distorted image, so make sure you have the projector at the correct distance from the screen.
It’s also important to consider the keystone correction. This is the adjustment that corrects the shape of the image if the projector is not placed at a right angle to the screen. If you’re having trouble with distorted images, keystone correction might be the solution.
Lastly, take a look at sharpness and resolution. A sharp image is essential for a good viewing experience, but sometimes the resolution of the projector may not match the resolution of your screen. If that’s the case, adjusting the sharpness and resolution of your projector can greatly enhance the image quality.
Change the Positioning of the Projector Relative to the Screen
To get a clear image from your projector, you should first try adjusting the built-in focus knob. Check the lens for dust, fingerprints, and other debris that might affect the image. If these steps don’t enhance the image, it’s time to consider the projector placement.
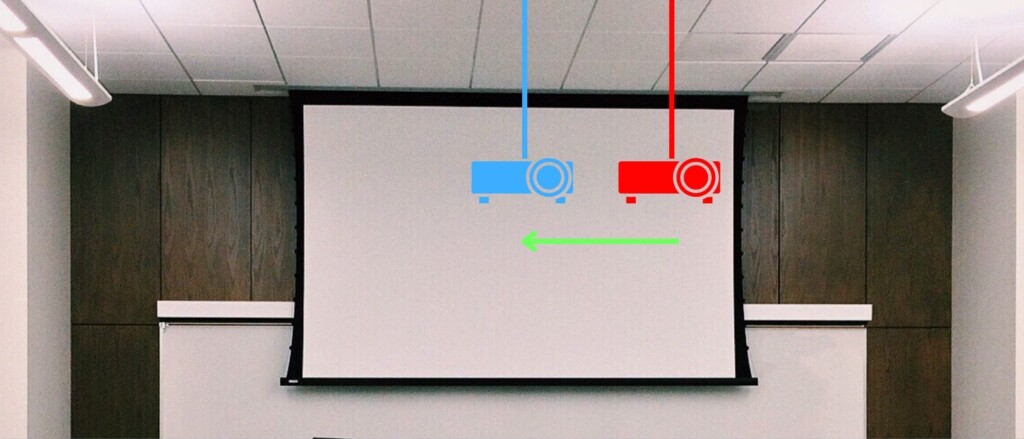
The focus knob is meant to fix small misalignments, but if the projector is off-center by more than a few inches, it’s necessary to move it. If you haven’t installed the projector yet, it’s important to find the centerline from the screen, as there is only one centerline to mount the projector along.
The projector has a required distance range from the screen. If the image is still blurry or fuzzy after adjusting the focus knob, physically move the projector until you find the right distance. To make this easier, there are calculators on google to facilitate this task.
Adjust the Keystone Correction
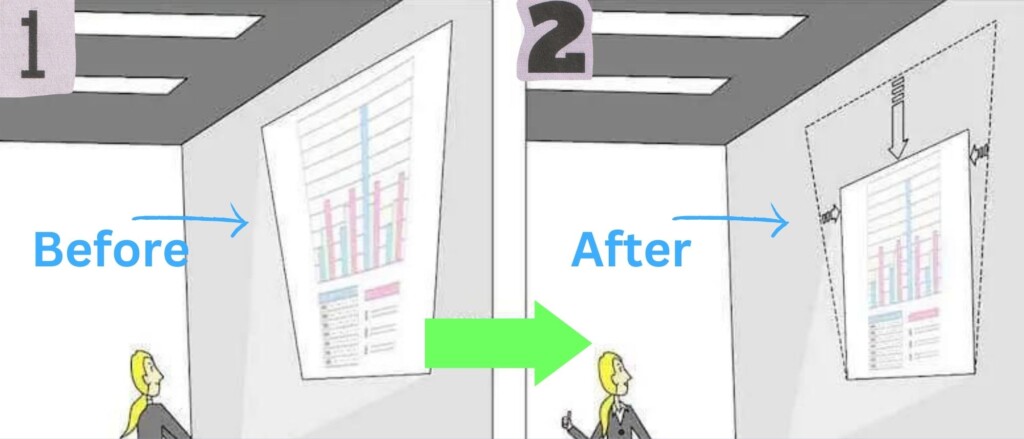
After focusing the image, you may need to make changes to enhance the projector’s image quality. One of the most common changes is keystone correction. Keystone correction is a feature all projectors have to fix problems caused by the projector’s height or center-line mounting not matching the screen.
Keystone correction comes in two types: vertical and horizontal. Determine which type you need to use by looking at the position of the projector. If the projector is mounted off-center, the image will be skewed. Horizontal keystone correction adjusts the image before it’s projected to fix this.
Vertical keystone correction addresses issues caused by the projector’s height. If the projector is mounted above or below the screen or at an angle, vertical keystone correction can be used to fit the image to the screen.
To set the keystone correction, go to the projector’s menu and find the keystone correction setting. Dial in the correction factor by increasing or decreasing it until the image looks correct.
If you’re looking to buy a projector, consider the Epson Home Cinema 3700 (On Amazon) or Optoma EH504WiFi Full HD Wireless DLP Projector (Also On Amazon), both of which have a lot of options for horizontal and vertical keystone correction.
Change the Sharpness and/or Resolution
Other features that you can adjust to enhance the image quality include:
Sharpness
Additionally, you can also use the sharpness setting to make the image appear more crisp and clear. Simply find the sharpness setting in the projector’s menu and adjust as needed. You can increase or decrease the sharpness until you find the ideal setting for your projector and room. Remember, it’s all about finding the right balance between clarity and contrast. So, keep experimenting until you find the perfect combination that works best for you.
Resolution
To ensure that the image quality is optimal, it’s important to match the resolution of the projector with the resolution of the device you’re using. In the case of a computer, this can be done by accessing the display management settings and making sure that the target resolution is correctly set. Most devices will automatically output the highest resolution possible to the projector, but it’s still a good idea to double-check and adjust if needed.
Brightness
To adjust a projector’s brightness, you can follow these steps:
- Locate the brightness setting in the projector’s menu.
- Use the remote or the controls on the projector to adjust the brightness to your desired level.
- If necessary, you can adjust the brightness level on your source device, such as a computer or DVD player.
- If you have trouble finding the right setting, you can try adjusting the brightness in small increments and observing the image until you find the right balance between brightness and image quality.
Color
- Locate the color settings in the projector’s menu, usually under a section labeled “picture,” “image,” or “color.”
- Use the remote or the controls on the projector to adjust the color settings such as hue, saturation, and tint.
- If necessary, you can also adjust the color settings on your source device, such as a computer or DVD player.
- To get the best results, you can use a color calibration tool or a test pattern to help you make precise color adjustments.
- If you have trouble finding the right setting, you can try making small adjustments and observing the image until you find the right balance between color accuracy and image quality.
Gamma
You can adjust the gamma to make the image appear more natural or enhance its overall look by following these instructions:
- Access the projector’s on-screen menu.
- Look for a “Gamma Correction” or “Brightness/Contrast” option.
- Adjust the gamma value to a value between 0.8 and 1.2 to make the image appear more natural.
- If you want to enhance the image, increase the gamma value above 1.2.
- Experiment with different values to find the best result for your projector.
- Save the changes and exit the menu.
To Sum Up
Correcting your projector image can be a challenge, but with persistence, you can achieve the perfect picture. There are a variety of variables that you may need to adjust, so be patient and don’t give up.
To start, try making small changes to different settings. You may need to adjust them multiple times until you find the right combination. The good news is, once you find the perfect setting, you may never have to adjust it again.
Trial and error is the key to success. Keep experimenting until you are satisfied with the image. With a little patience, you’ll soon have a clear and bright picture on your screen.
Related Q&A
Q1: What should I do if my projector image is blurry?
A1: Adjust the projector focus. Twist the physical focus adjustment ring around the lens to narrow or expand the image and enhance clarity.
Q2: How do I adjust the focus on my projector?
A2: Start by placing the screen where you want it. Then, position the projector far enough back based on its throw ratio. Turn the projector on and use the focus ring to move the slice of the light beam where the image looks good onto the screen.
Q3: What if part of the image is in focus but the other part is blurry?
A3: It could be an issue with the lens of the projector. Check the lens for dust, condensation, or greasy fingerprints that may interfere with the light beam and cause distortion.
Q4: How do I clean my projector lens?
A4: Don’t use just any piece of cloth to clean the lens, as this could seriously damage it. Follow a step-by-step guide to cleaning a projector lens.
Q5: Can a change in temperature cause my projector lens to fog up?
A5: Yes, big swings in temperature can cause condensation to form within the lens, particularly if the projector is stored in a garage or attic. Wait for the projector to come back to room temperature.
Q6: What should I do if the entire image is too blurry to dial in the focus?
A6: Check the lens for dust, condensation, or fingerprints that may cause distortion. Clean the lens if needed.
Q7: Why does the projector image get larger as I move further away from the projector?
A7: The further you get away from the projector, the larger the image gets because of the mismatch between where the image is in focus and where the screen is.
Q8: What is keystone correction?
A8: Keystone correction is a feature that adjusts the trapezoidal distortion of an image projected on a non-flat surface, making the image look rectangular.
Q9: How do I adjust the keystone correction on my projector?
A9: The exact method for adjusting keystone correction varies by projector model. Check the user manual for specific instructions.
Q10: What is the throw ratio of a projector?
A10: The throw ratio is the distance between the projector and the screen divided by the width of the image. It determines the size of the image that the projector can produce.
Q11: Why is the throw ratio important for setting up a projector?
A11: The throw ratio is important because it determines the positioning of the projector relative to the screen and the size of the image it can produce.
Q12: How do I change the sharpness and/or resolution of my projector image?
A12: The method for changing sharpness and/or resolution varies by projector model. Check the user manual for specific instructions.
Q13: What if I don’t know what some of the settings mean or how to adjust them?
A13: Don’t worry if you’re not familiar with all the settings. These details are explained in the user manual or other resources.
Q14: What if I can’t find the solution to my projector problem in the user manual?
A14: If you can’t find the solution in the user manual, try contacting the manufacturer for support or consulting online forums for assistance.


1 Comment