Can you use a projector without a screen? Yes, you can. However, the image quality will suffer. A white wall might seem like a good surface to project an image, but it has some drawbacks. A wall doesn’t reflect light as efficiently as a projector screen. Additionally, a wall’s surface is not as smooth as it appears.
So, why shouldn’t you use a projector without a screen? A projector screen is designed to provide a smooth surface for the light to reflect off of, which leads to a clearer and sharper image. But, if you don’t want to buy or use a projector screen, that’s your choice. Just be aware of the potential issues you may face.
If you still want to use a wall instead of a projector screen, you need to make sure the wall is clean and smooth. That way, you can achieve the best image quality possible. Don’t worry, you’re an adult and you can make your own decisions. Now you know the facts, you can make an informed choice.
Table of Contents
Projector Screen vs Wall – Why you shouldn’t use a projector without a screen?
Using a projector without a screen can impact the quality of your image. There are two main reasons for this:
- Wall color and reflectiveness – The color of the wall can impact the clarity and brightness of the image. A wall with a lighter color reflects light better, resulting in a clearer image.
- Uneven texture of walls – Walls often have an uneven texture, which can cause distortion and blurring in the projected image. A projector screen provides a smooth and even surface, leading to a clearer image.
Wall color and reflectiveness
Projector screens offer an advantage over walls in terms of image quality. They have a special coating that enhances their reflectiveness. This coating helps to improve the brightness and clarity of the image. In comparison, a typical wall does not have this coating and the image projected onto it will be duller and less vivid.
Another factor to consider is the color of the wall. White objects naturally reflect light better than any other color. This means that a white wall will provide a clearer image compared to a darker wall. The projector’s light won’t be drowned out on a white wall, allowing you to see the details in the image. If your wall is not plain white, you may need to repaint it to achieve the best results.
Uneven texture of walls
The texture of a wall can also affect the quality of the projected image. Although walls may seem flat and smooth, they often have small bumps and crevices. When light is projected onto a wall, these imperfections can cause tiny shadows to appear on the image. These shadows will reduce the overall brightness and crispness of the image.
The impact of these imperfections on the image quality will depend on the quality of your projector. If you have a cheap projector with a low-quality image, these imperfections won’t have as much of an impact. However, if you have invested in a high-quality projector, these imperfections will significantly affect the image quality.
Projector screens provide a highly reflective and ultra-smooth surface that can’t be achieved with a typical wall. By using a projector screen, you can ensure that your image is bright, clear, and crisp, regardless of the quality of your projector.
How to use a wall as a screen?
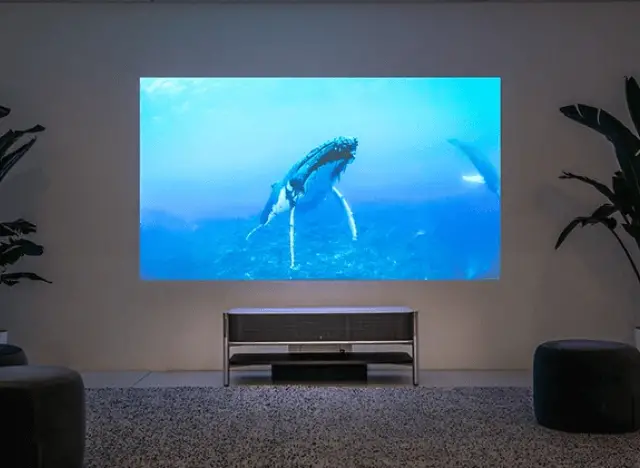
If you opt to use a wall instead of a projector screen, there are a few things you can do to improve the quality of the image projected. Here are a few tips to consider:
1. Make the wall as smooth as possible
After sanding, make sure to fill in any remaining gaps or cracks with spackling compound. This will create a perfectly flat surface that will not cause any shadows or impair the quality of the projected image.
Finally, prime and paint the wall with a high-quality white paint. This will ensure that the wall is highly reflective and ready for the projector’s light.
By following these steps, you can create a wall that will provide a quality image for your projector. However, keep in mind that even with the best preparation, a projector screen will still provide a better image. So if you want the best possible experience, it’s always best to invest in a projector screen.
2. Paint the wall
If you want to project images on a wall, consider painting the wall with projector screen paint. This paint reflects light better and enhances the quality of your projections. However, it’s worth noting that it can be expensive.
A quart of screen paint (on Amazon) costs around the same as a regular projector screen. This is one of the more affordable options available.
My advice is to start by painting the area with regular white paint or primer. Sand and reapply as needed, and then apply a thin coat of screen paint on top. This way, you can still get the benefits of screen paint even if you’re on a budget. You can even get two thin coats out of one quart of paint.
If you’re looking for an effective solution to improve your wall projections, consider investing in high-quality screen paint. A gallon of screen paint (on Amazon) costs about the same as the Silver Ticket 100″ Fixed Frame Projector Screen (on Amazon).
Multiple coats of screen paint provide the best results. One gallon will allow you to apply more coats than one quart. White screen paint is the most commonly used option, but if your projector has a high lumen count (around 3,500), consider using gray paint.
Projecting 3,500 lumens onto a white screen can be quite intense and might cause eye strain. The light would reflect directly at your eyes, making it difficult to watch the projections. However, if your projector’s lumen count is lower, white screen paint is a good choice.
Although you don’t have to paint your wall with specific screen paint, it is a great way to enhance your projections. It helps to ensure the best possible experience for you and your audience.
3. Construct a frame around the projected image
Having a frame around your screen is a must-have. It helps your viewers focus on the high-quality image, and makes a huge difference in image quality. Most screens come with a black border, which enhances the image and provides a clear starting and ending point.
The frame helps your eyes stay focused on what’s being displayed and not wander to the edge of the screen. If you struggle with focusing on small details, a frame will be especially helpful for you. It also increases the contrast between the wall and the image.
To build a frame, set up your projector and display a full image on the wall. Use a pencil to mark the edges of the projected image, and then use black velvet tape to outline the area. For an even better look, you can build a wooden frame and wrap it in thin black carpet. This creates a professional and eye-catching frame that will make your projections stand out.
To Sum Up
Overall, you don’t have to do anything special to use a projector without a screen. You can project on any wall you like, but if you’re picky, these small changes can make a big impact.
Smoothing the wall, painting it, and adding a dark frame around the projection area will enhance your viewing experience. But, after all the work of prepping the wall and buying materials, is it worth it compared to just purchasing a pre-made projector screen? In my opinion, no.
Projector screens aren’t overly expensive, and purchasing one will save you time and effort. So, why not choose the easier option and get a pre-built projector screen? In the end, the choice is yours, but a pre-made screen is the more convenient option.
If you’re in the market for a projector screen, you might be wondering if you need a special one for a 3D projector. Our guide has you covered, but it’s worth mentioning that you don’t necessarily need a specific screen for a 3D projector.
There are many affordable options available on the market. If you’re on a tight budget, we suggest purchasing projector screen material and building your own frame around it. This can be a good solution if you’re looking to save some money.
However, if you have a little extra budget, consider investing in a fixed frame projector screen. It will save you time and effort and will likely provide a better overall experience.
If you’re interested in setting up a projector screen in your living room, we have an article on that topic as well. Projecting movies and shows in your living room can be a truly enjoyable experience. So, why not give it a try!
Related Q&A

- What is a projector? A projector is a device that projects images or videos onto a surface.
- Can you use a projector without a screen? Yes, you can use a projector without a screen.
- What surface can you use instead of a screen? A white wall or a white sheet can serve as a surface to project images onto.
- How do you adjust the focus of a projector without a screen? By moving the projector closer or farther away from the projection surface, you can adjust the focus.
- What should you consider when projecting onto a wall? Ensure the wall is smooth, clean, and a neutral color to get the best image quality.
- Can you use a colored wall as a projection surface? Yes, but the image quality might not be as good as when projecting onto a white wall.
- Is projecting onto a window recommended? No, projecting onto a window is not recommended as it will result in poor image quality and glare.
- How do you control the brightness when projecting without a screen? Adjusting the projector’s brightness and contrast settings will help control the brightness of the projection.
- Can you project onto a curved surface? Projecting onto a curved surface can cause distortion in the image. A flat surface is recommended for best results.
- Does the size of the projection surface affect image quality? Yes, the larger the projection surface, the better the image quality will be.





1 Comment